Switching to Event mode
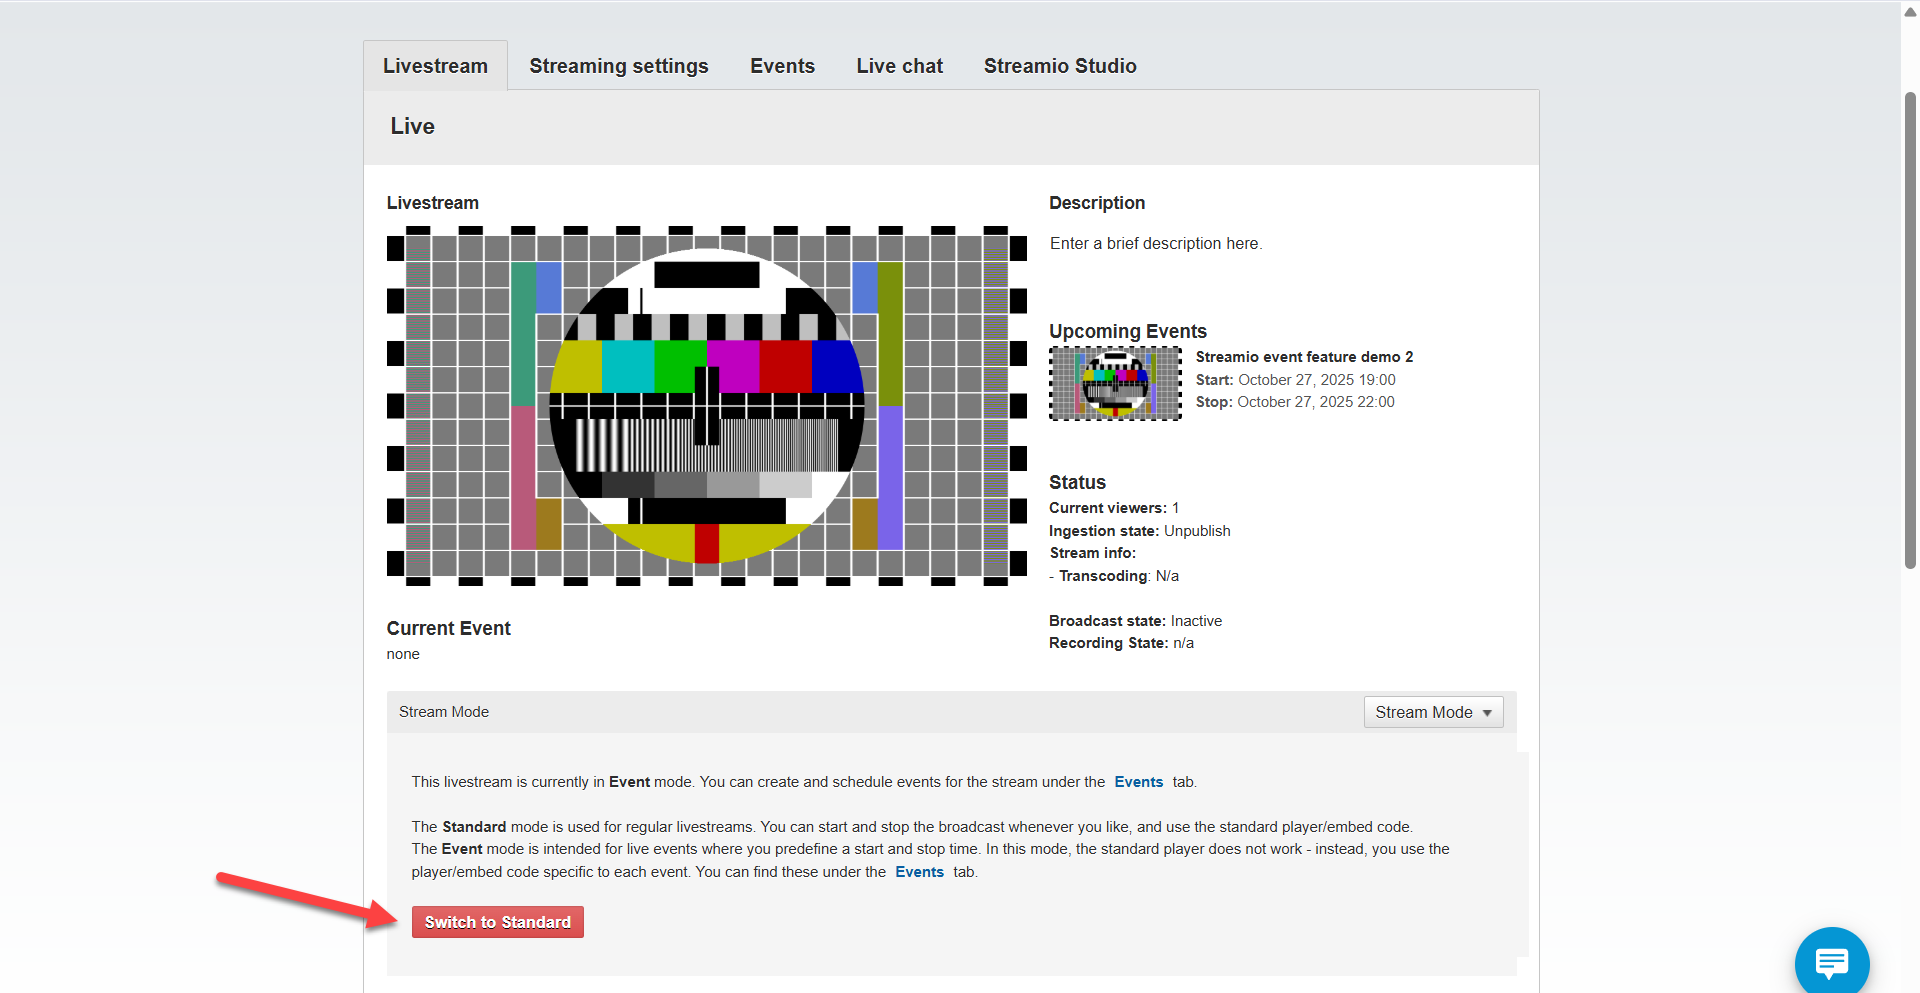
By default, your livestream uses Standard mode. To access Events, you need to switch your livestream to Event mode.
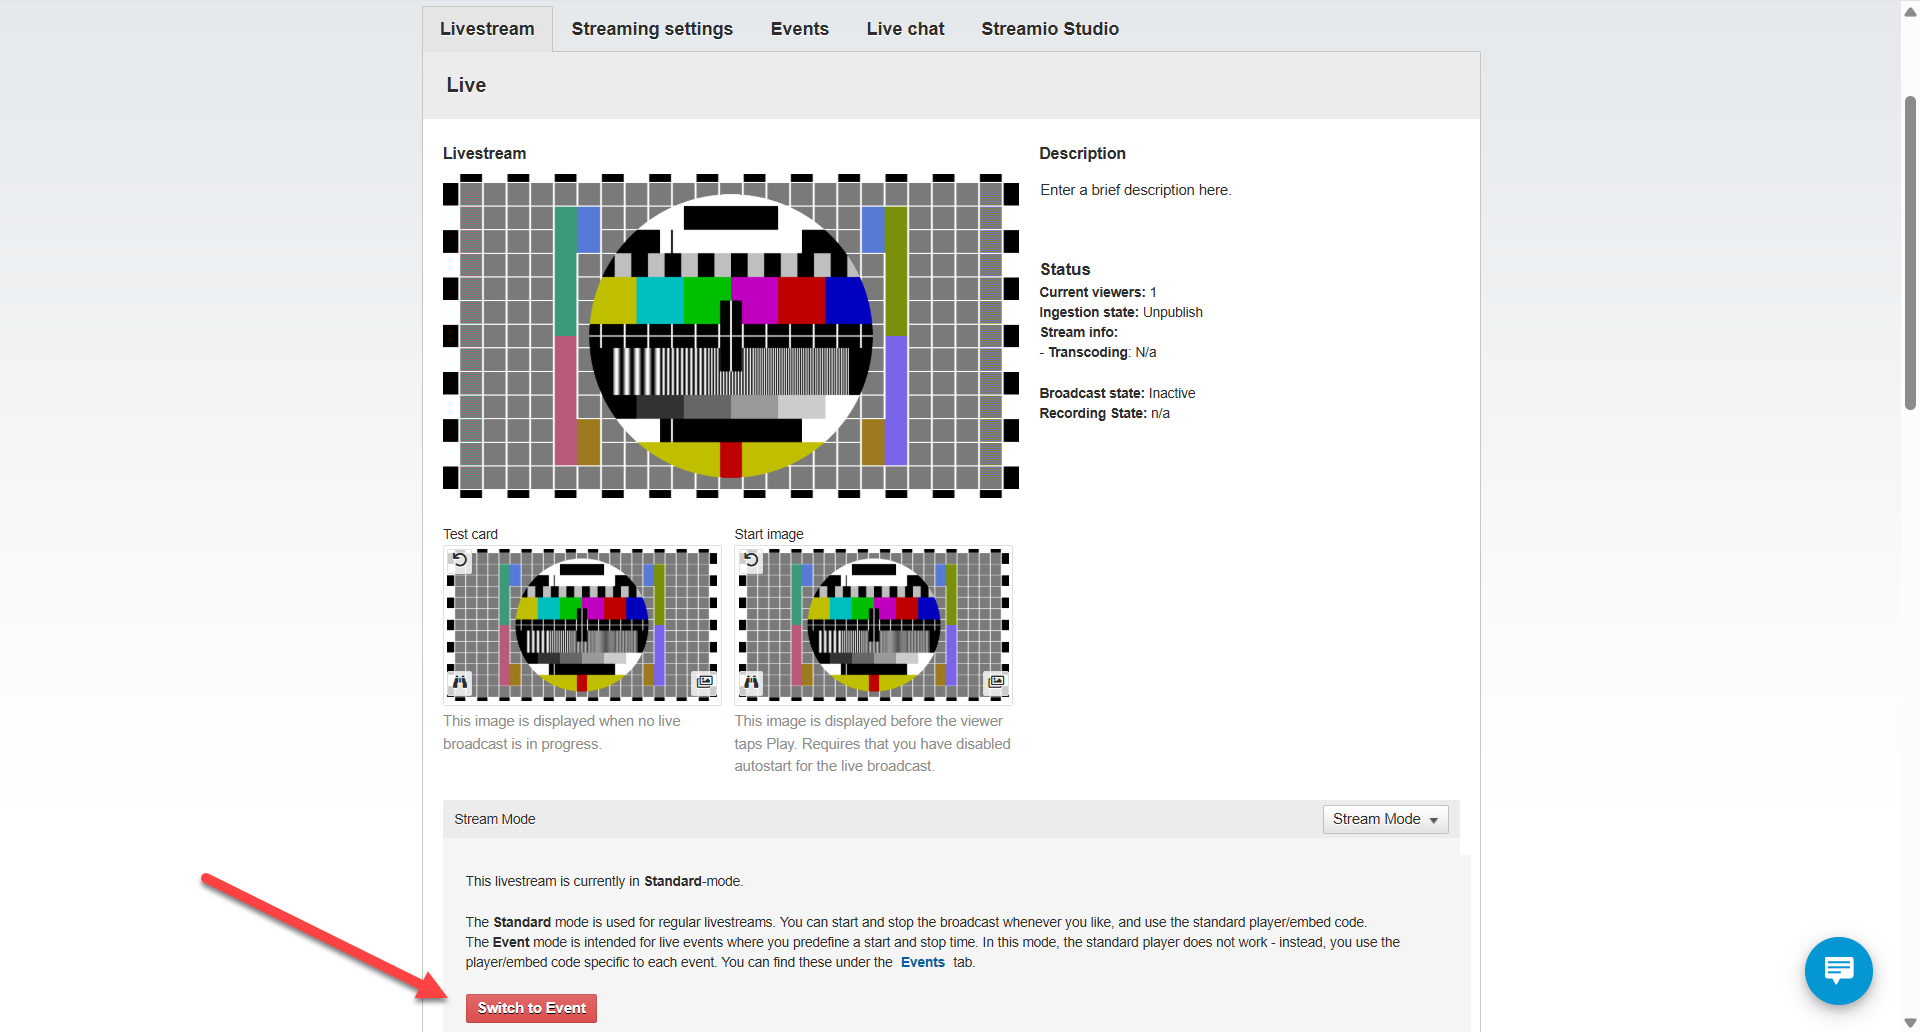
Once you switch to Event mode, the standard player and embed code will no longer work. Instead, each event you create gets its own player and embed code, preventing confusion when running multiple events from the same livestream.
Creating an event
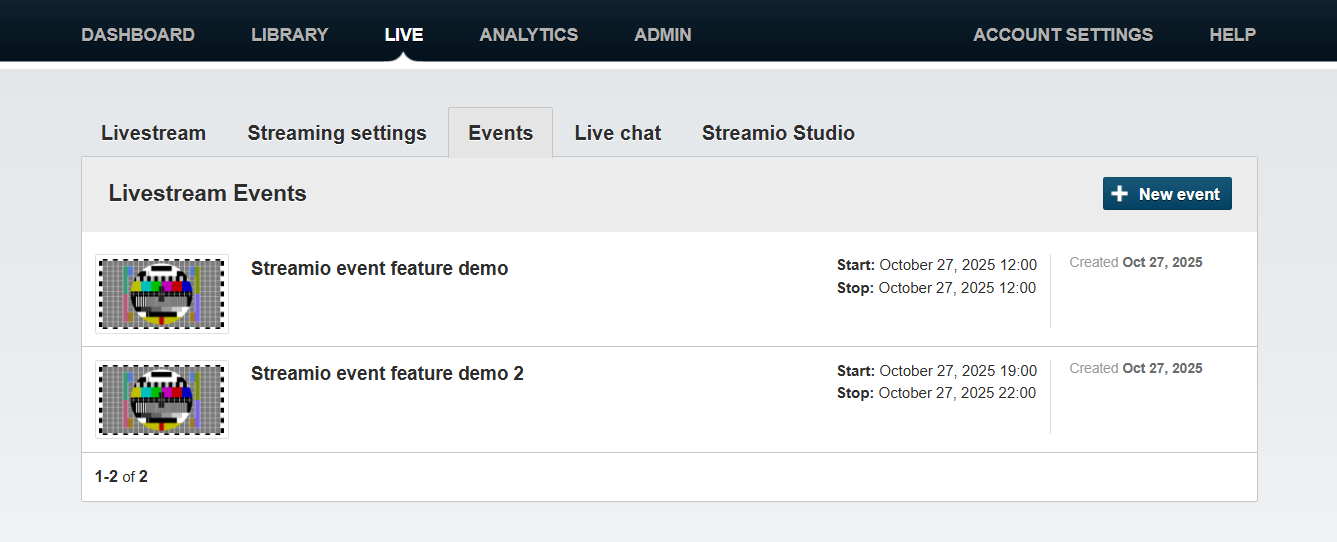
1) Navigate to your livestream and go to the Events tab.
2) Click the “New event” button.

3) Fill in the basic information:
-
-
Title: Name of your event.
-
Background color: The color displayed while waiting for the stream to start.
-
Start time: When your broadcast begins (based on your account’s timezone).
-
Stop time: When your broadcast ends.
-
Lead time: How many minutes before the start time viewers can see the stream. For example, if you set a 15-minute lead time and your event starts at 14:00, the player will show the stream beginning at 13:45.
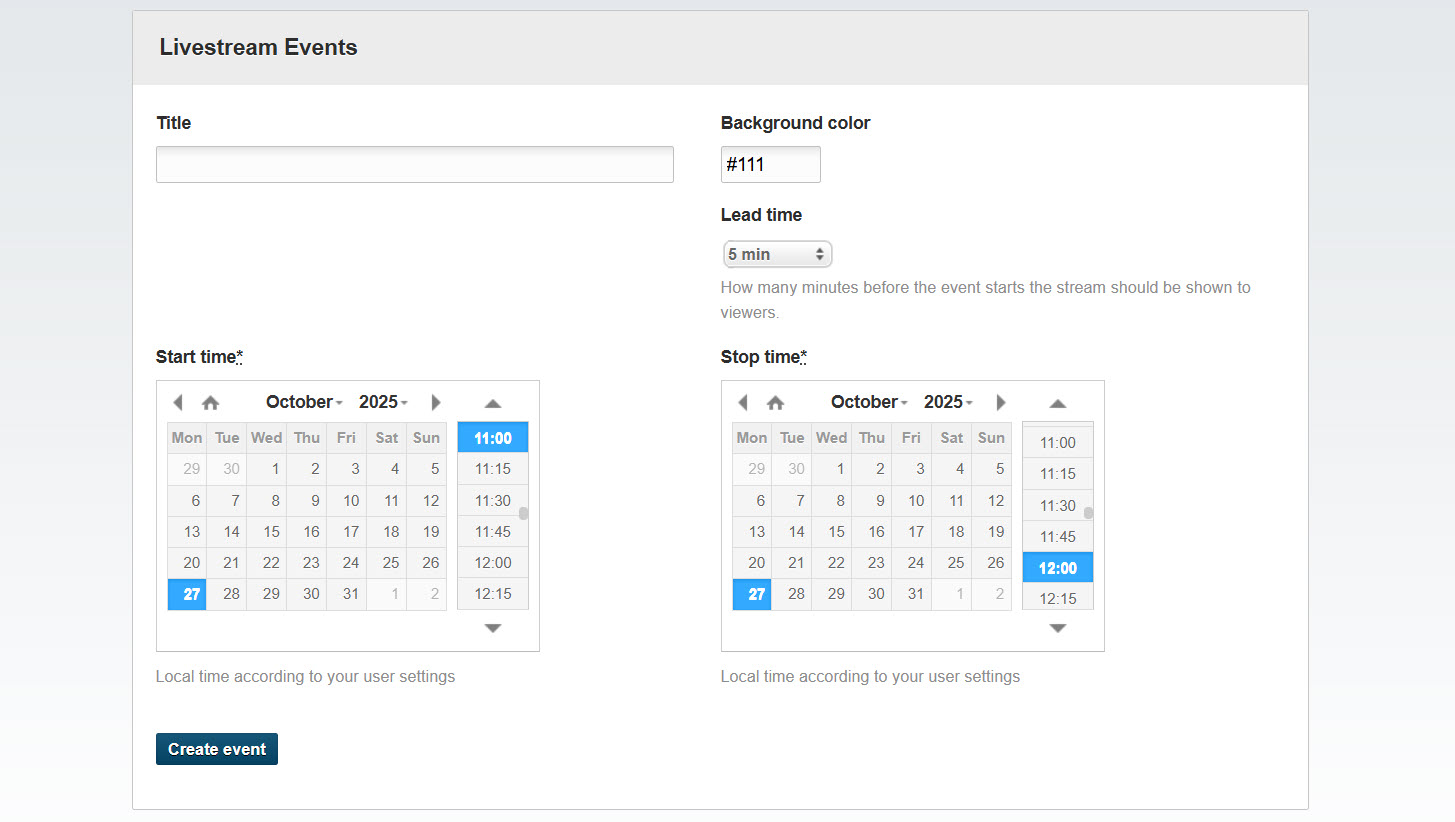
4) Click “Create event” when you’re ready.
Publishing your event
After creating your event, you’ll see it listed in the Events tab. Each event has its own player and embed code, which you can copy and add to your website or other platforms.
Customizing the viewer experience
After creating an event, you can customize what viewers see at different stages.
Before the event starts
-
Add a pre-event image (such as an event banner or speaker headshot).
-
Add text to appear before the stream goes live (e.g. “Stream starts at 14:00” or event details).
During the event (if the stream is offline)
-
Add an image to indicate whether the stream has accidentally stopped or hasn’t started yet.
-
Add text to explain the situation (e.g. “Technical difficulties, back soon” or “Stream will start shortly”).
After the event ends
-
Add a post-event image (e.g. a thank-you message or an upcoming events banner).
-
Add text to appear once the broadcast finishes (e.g. “Thank you for watching” or links to related content).
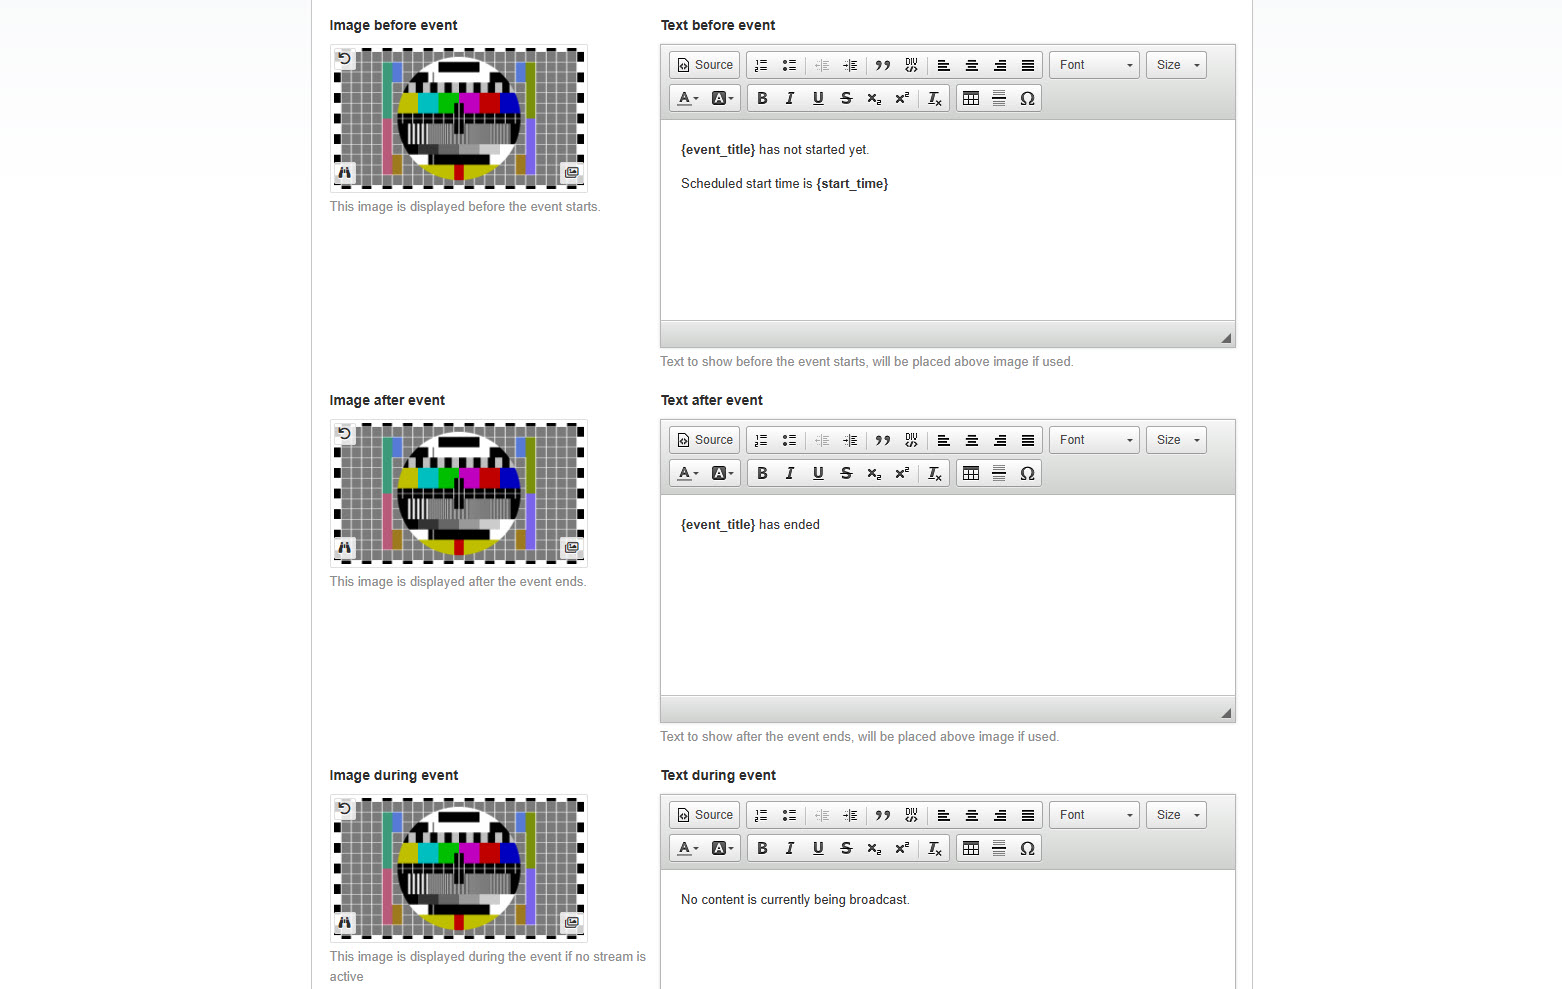
These customizations keep your audience informed, rather than seeing a blank player.
How lead time works
Lead time determines when viewers can start watching before your official start time.
If your event is set to start at 14:00 with a 15-minute lead time, viewers will see your stream appear at 13:45. This is useful if you want viewers to join early while you’re doing sound checks or showing preparation content.
If you don’t want any lead time, set it to 0 minutes.
Switching events or going back to Standard mode
You can switch between Standard mode and Event mode whenever you need. Keep in mind that switching modes changes which player embed code you use. Events you created will still remain when you switch from Events mode to Standard mode. To view your events, switch back to Events mode.
Scenarios and tips
Running multiple events
Create each event in the Events tab. Each gets a unique embed code, so you can publish them separately on your website or promote them independently on social media.
What if my stream starts late?
Your event will still be visible to viewers at the scheduled start time (or lead time). You can go live whenever you’re ready, and the viewer experience won’t be interrupted.
What if I need to cancel an event?
The recommended approach would be to remove the event embed code where it is published, then replace it with a preferred message to your audience informing them that the event is cancelled, and then delete the event from the Events tab.
Keep in mind that if you delete the event while the embed code is still published, e.g., on your website, the embed code will no longer work, and viewers who try to access it will see an error message on the event page.
Using images and text effectively
Keep pre-event and post-event images simple and on-brand. Text before the event should set expectations. Text during the event (if the stream is down) should be helpful and reassuring.