The easiest way is to open the Streamio site – www.streamio.com – and hit the “Sign in” button, far up on the right side. This will take you to the Streamio login page, where you can enter your username and password. From this page, it is also possible to sign up for a test account.
Tip! Get an extra trial account to use for testing things out. It is free, and it feels safer to use an account you can just abandon if things get messy!
Once logged in, you will be greeted by the dashboard. Here you can find links to the most common functions, information about your account and its’ usage for the current period, as well as the contents of your account.
The fastest way of uploading a video is to click on the link “I want to upload a video!” in the dashboard. You could also click on “Library” and the button “+ Upload video” which is located high up on the right side of the page.
In both cases, the dialog for uploading new videos will show.
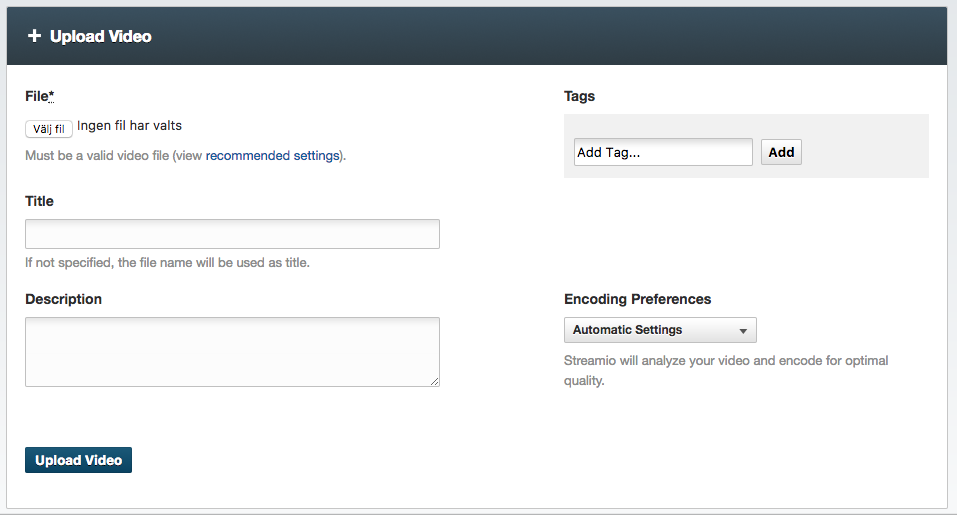 The easiest and fastest way to upload is to click the
“Choose file” under “File,” select your video and click “Upload video.”
The video will be uploaded, the video format will be checked, and you will be presented with the video library where the video is encoded. You have uploaded your first video to Streamio!
When uploading a video, it is a good idea to name the video in the title box for easier identification in the video library. The name is also searchable. A description can be added which is convenient if you upload several versions of a movie or if you just need to enter more information that would be suitable in the title.
Tags are another way of adding information to a video. You can use tags to filter videos in the library (use it to tag videos with usernames, departments, or maybe information that is often used such as “shareholders meeting” or “instruction video”). It is also possible to create an “archive player” that automatically fetches videos with a specific tag and updates automatically as new videos are added or removed. Click here to read more about tags.
The choices are “Automatic setting” which is Streamios standard-setting, the most common choice. You can also create your own system’s settings for how the videos should be encoded and choose that manually with “Account encoding settings.” It is also possible to select “Custom settings” and create an encoding profile for this particular video in this dialog. Finally, there is a “Do not encode” setting that uploads the video without making any encoded versions, which can be handy if you upload all your movies to the Streamio library, but don’t expect to publish it anywhere and want to save space. You can also make a nonencoded video playable by choosing “Use this file as a transcoding” – which makes it possible to publish it – perfect if you have the perfectly encoded video already and just want to post that!
Sometimes you need to upload a whole bunch of videos at once and now there is a function that helps with that – read more about it here!