Did you know that you can create and customize your own Streamio Video Player? For example, if you want to publish a video on your blog or website, you may want to have a Player with a certain size, a certain color and certain features.
As usual, we have tried to make this process really, really simple for you:
In your Library, select the Player-tab and then click “Create New Player”.
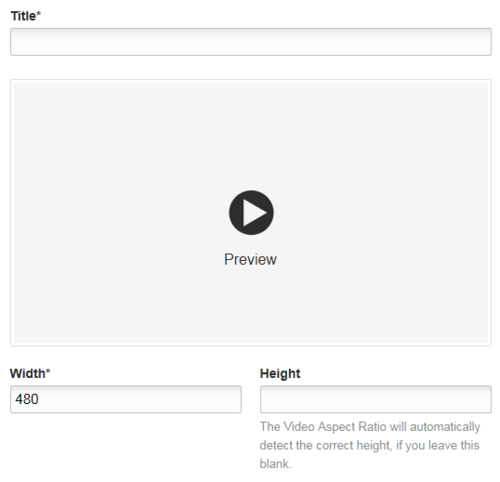
The first thing you need to do is to give your new player a Title and then specify the Width (in pixels) you want your Player to have.

You can also specify the Height for your player, if you want, but we recommend you leave this field blank – this way, your new Player will automatically adjust to the correct height that is best suited for whatever video you want to publish.
Next, you can configure how you want your player to look and work.

The Tags section lets you add smart tags to your Player – for example, you could add a “Blog” tag to remind you that this Player will be used on your company blog. We’ll take a more in-depth look at how you can use Smart Tags effectively in a future blog post.

The Default Player section allows you to set this Player as your Default Player, i.e. the Player that you are most likely to want to use when publishing your videos. You can always switch and select any player when you want to publish a video, but the one you have chosen to be your Default Player will always appear first on this list.

In the Color Theme section, you can decide if you want your Player to have a black or white color theme. By default, the Black color theme will be activated.

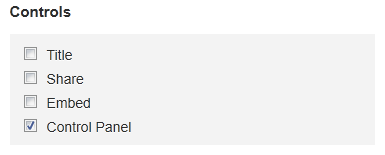
In the Controls section, a group of check boxes will let you enable or disable various features in your Player– do you want a Title Bar with the title of your video visible? A Share-button? An Embed-button? Would you like to show or hide the Control Panel? By default, only the Control Panel will be activated.

Finally, in the Functions section, you can determine how you want your player to work.
- If you activate “Autoplay”, the video will automatically start playing as soon as a visitor visits the web page where the video has been published.
- If you activate “Disable RTMP Streaming”, your videos will load progressively instead of being streamed in real-time. For videos shorter than 3-5 minutes, we recommend that you disable RTMP streaming. If the video is longer than 3-5 minutes, we recommend that you leave this box unchecked.
- The “Loop”-function will make your video play over and over again automatically.
Once you have selected the right look and feature for your new Player, just hit the “Create Player” button and you’re done! You can now publish any video on your Streamio account using this player.
Oh… just one more thing – you can create as many players as you want, of course. You can, for example, create different players for different sections of your website and then easily select the appropriate Player depending on where you want your videos to be published.
We hope you will find this feature useful!
If you have any questions on how to configure your Player, just beep us an e-mail.

